I have been frustrated that Image Capture (the built in scan and camera tool on the Mac OS) seems to be limited to 600 DPI no matter what your scanner's ability. What also surprised me is when I search for it I can't find anyone else talking about this limitation.
I do find advice on scanning that says if you want quality don't use the OS or software that came with the scanner and buy third party software like VueScan. While VueScan is amazing software that seems to support every scanner ever made, it is also difficult to use and doesn't integrate automatically into PhotoShop the way Image Capture does.
There may be a really good reason for the 600 DPI limit in Image Capture. Maybe it follows the Apple philosophy of guiding you to the right tools. They assume if you need better than 600 DPI then you should use more advanced software. But you don't have to if you're comfortable editing a plist file.
The following procedure worked for me and I've scanned dozens of images now at 1,600 DPI using Image Capture without issue. Possibly this is like overclocking and my scanner will die sooner because something is wrong here, so follow this knowing I'm really unsure if this is a good idea.
Here's how to scan at greater than 600 DPI in Image Capture:
0. Be sure to back up the file ahead of time and check your EULA to be sure editing it is legal. (This step is a reminder that your plist file may have zero based arrays.)
1. Find your scanner in the Image Capture settings in the system library folder. Typically this is:
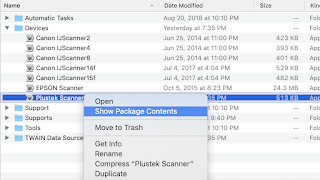
Macintosh HD > Library > Image Capture > Devices
2. In this folder will be a package for every scanner that your computer connected to. In my case I was looking for "Plustek Scanner". Right click on the package with your scanner name on it and choose "Show package contents".
3. You'll now be looking at the contents of the package. Look for the scanner plist. I'm not sure if it's always the same, but for a few I checked it was always this file:<integer>1200</integer>
<integer>1600</integer>
6. In step five the X DPI is set, so now the Y DPI needs to be set identically. Search the document for the first instance of ICAP_YRESOLUTION and put in the exact same entry you did in this location as you did in step five. Also to note, the order matters.
7. Save the plist file.
8. Open Image Capture and scan with the newly unlocked resolutions.


No comments:
Post a Comment